Mixed Berry Cream Cheese Crumble Tart

I first saw this recipe here and knew since my Taste Tester loves a berry tart, I needed to try this recipe sooner than later. I used our favorite mix of berries: strawberries, raspberries and blueberries. Though there are several components to this recipe, none were difficult and it came together fairly quickly. You do need to plan ahead a bit as this is not a last minute type of dessert. The dough needs to chill for a while before baking and the crust and topping should be baked and cooled before assembling the tart.

My Taste Tester enjoyed the crust and the crumble of this tart but preferred the pastry cream from our usual tart recipe over the cream cheese filling in this one. He said he could not tell the difference between the two crusts but did really enjoy the crumble and has asked if I can make the topping again and add it to other baked goods. I may try it on top of our usual tart and see how that tastes.  My thoughts are that this tart seems like a more sophisticated version of a fruit pizza, while it is good, the cream cheese filling just didn’t do ‘it’ for me.

I would make this again for company as I do think it is a crowd-pleaser and would be great for a summer dessert.

I rate this recipe an 8

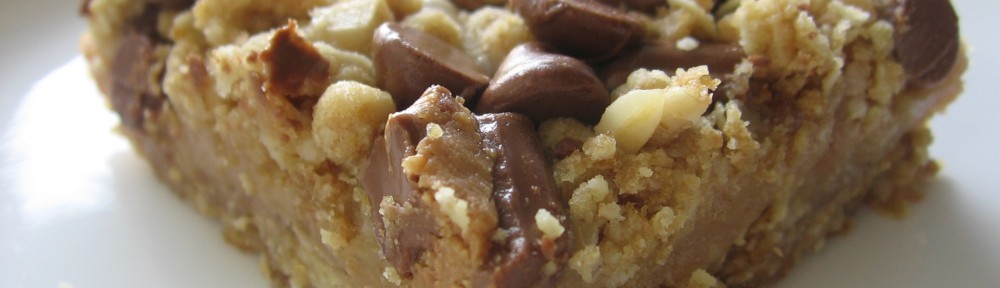
Mix Berry Cream Cheese Crumble Tart
recipe adapted from here

Cookie Dough Tart Crust:
2 tablespoons slivered almonds (I used 1/4 cup)
6 tablespoons powdered sugar, sifted
1¼ cups all-purpose flour
Pinch of salt
½ cup unsalted butter, cold, cut into 8 pieces
1 egg yolk
½ teaspoon vanilla extract

Almond Crumb Topping:
1¼ cups all-purpose flour
1/3 cup granulated sugar
¼ teaspoon baking powder
¼ teaspoon ground cinnamon
Pinch of salt
¼ cup slivered almonds, coarsely chopped (I used a bit more)
½ cup unsalted butter, melted

Strawberry Cream Cheese Filling:
16 ounces cream cheese, at room temperature
1 cup powdered sugar, sifted
1½ teaspoons vanilla extract
16 ounces fresh strawberries, rinsed, hulled and halved (quartered if large) (I used a variety of mixed berries)

1. Make the Tart Crust: Combine the almonds and powdered sugar in the bowl of a food processor and pulse repeatedly until finely ground, about 1 minute. Add the flour and salt and pulse a couple of times to mix. Add the butter and pulse again repeatedly until no visible pieces of butter remain (about 10 pulses). Add the yolks and vanilla and continue pulsing until the dough forms a ball. Turn the dough out onto a floured surface, shape into a thick disk, and wrap in plastic wrap. Refrigerate until firm, at least 1 hour.

2. Remove the dough from the refrigerator and allow it to soften at a cool room temperature for about 20 minutes, just until it is soft enough to roll without cracking, but still firm. Unwrap it and place it on a floured surface. Use the palm of your hand to press it to a thickness of about 1/4 inch. Flour the work surface and the dough and gently roll the dough into a 13-inch disk, adding pinches of flour under and on top of the dough as needed. Transfer it to a 10-inch tart pan. Evenly fit the dough into the pan, making sure it’s flat against both the bottom and side of the pan. Trim away any excess dough at the rim of the pan by rolling over with a rolling pin or scraping it away with the back of a paring knife. Slide the tart pan onto a cookie sheet, cover it with plastic wrap and refrigerate it for several hours or overnight before baking.

3. When ready to bake, arrange the racks in the upper third and lower third of the oven. Preheat the oven to 350 degrees F. Line a baking sheet with parchment paper or a silicone baking mat; set aside.

4. Make the Crumb Topping: In a medium mixing bowl, whisk together the flour, sugar, baking powder, cinnamon and salt. Stir in the chopped almonds. Use a rubber spatula to stir in the butter until all of the dry ingredients have been evenly moistened. Let the mixture stand for 5 minutes, then use your fingertips to break the mixture into ¼- to ½-inch crumbs. Scatter the crumbs on the prepared pan.

5. Remove the tart pan from the refrigerator, and remove the plastic wrap. Line with a piece of parchment paper and fill the pan with pie weights. Bake the tart crust in the lower third of the oven and the crumb topping in the upper third. After 10 minutes, remove the paper and pie weights from the tart shell and place it on the upper rack, and move the crumbs to the lower rack. Continue baking the tart shell until it is dry and light golden, 15 to 20 additional minutes. Bake the crumb topping until it is deep golden and firm, 10 to 15 additional minutes. Check the crumbs around the 10 minute mark and then go from there Cool the crust and the topping on wire racks.

6. Make the Cream Cheese Filling: Beat the cream cheese on medium speed just until it is smooth, scraping the sides of the bowl as necessary. Add the powdered sugar and vanilla extract and continue beating until lightened, about 1 minute.

7. Assemble the Tart: Spread half the cream cheese filling on the bottom of the tart crust and arrange the sliced strawberries on it, cut side down. Spread the remaining filling over the strawberries. Evenly scatter the crumb topping over the filling. Right before serving, lightly dust the topping with powdered sugar and garnish with additional strawberries, if desired. Unmold the tart from the pan and place it on a platter. Wrap and refrigerate leftovers.

Note #1: You can omit the nuts in both the crust and the crumb topping. No need to substitute anything else.

Note #2: You should assemble the tart within a few hours of serving it, as the crust will soften after it has been refrigerated.

Quick Berry Tart

A quick post today as we are going to enjoy the warm, rain-free day!

This recipe has been featured on many many blogs and is originally from Dorie Greenspan. Please do not see the LONG recipe below and be scared. This is one easy dessert to make with very common ingredients you probably already have. This is not actually that ‘quick’ of a recipe unless you have the components ready to assemble so plan ahead by a day if you want to serve this. This dessert has been our ‘go to’ dessert for entertaining this summer. We can’t get enough.

The great thing about this recipe is that there only 3 components: the tart shell, the pastry cream and the berries. You can easily make the first two components a day or so in advance and then assemble when you are ready to serve. Like I said, that is where the “quick” comes in. Assemble and serve!

The Taste Tester is in love with this recipe. Quite literally, he has begged and pleaded for me to make this again, even though we just had this last week. He at the entire tart (well, all except for 1 piece  that I ate) in one day. I prefer if it is assembled about 3-5 hours before serving as the pastry cream softens the crust ever so much and makes it easier to eat with a fork.

I would not change a thing about this tart, it is easy to make, easy to assemble and such a great way to highlight fresh berries. Each component really does compliment the others and comes together to make this amazing dessert that is sure to impress your family and friends. The crust is light in texture with a slightly sweet flavor. The cream is rich and smooth with a slight vanilla flavor. The berries hold their own and make you thankful for summer.

I rate this recipe a 10

Summer Berry Tart
Adapted from Dorie Greenspan 

About 1 1/2 cups Pastry Cream, cooled or chilled (Recipe Below) (I used the entire recipe of pastry cream)
1 9″ tart shell made with Sweet Tart Dough or Sweet Tart Dough with Nuts (Recipes Below)
2 pints fresh berries (for example: raspberries, blueberries, blackberries, or strawberries)
1/3 cup red currant jelly mixed with 1 tsp of water, for glazing (I did NOT use)

Smooth the pastry cream by giving it a couple of strong turns with a whisk. Spoon enough pastry cream into the tart crust to come almost to the rim, then even the surfact with a rubber spatula. Carefully lay the berries on the cream, arranging them in any pattern that pleases you. If you are using strawberries, either halve them from top to bottom or slice them, depending on the size of the berries and your whim.

*I did NOT do the step below
Bring the jelly and the water to a boil in a microwave oven or on the stovetop. Working with a pastry brush or a pastry feather, dab each berry with a spot of jelly. Or, if you like, you can glaze the entire surface of the tart, including the bit of pastry cream that peeks through the berries.

Pastry Cream
Makes about 2 cups
Storing: The pastry cream can be kept tightly covered in the refrigerator for up to 3 days.

2 cups whole milk
6 large egg yolks
1/2 cup sugar
1/3 cup cornstarch, sifted
1 1/2 tsp pure vanilla extract
3 1/2 TBSP unsalted butter, cut into bits at room temperature

Bring the milk to a boil in a small saucepan.

Meanwhile, in a medium heavy bottomed saucepan, whisk the yolks together with the sugar and cornstarch until thick and well blended. Still whisking, drizzle in about 1/4 cup of the hot milk- this will temper, or warm, the yolks so they won’t curdle. Whisking all the while, slowly pour in the remainder of the milk. Put the pan over medium heat and, whisking vigorously, constantly and thoroughly (making sure to get into the edges of the pot), bring the mixture to a boil. Keep at a boil, still whisking, for 1 to 2 minutes, then remove the pan from the heat.

Whisk in the vanilla extract. Let sit for 5 minutes, then whisk in the bits of butter, stirring until they are fully incorporated and the pastry cream is smooth and silky. Scrape the cream into a bowl. You can press a piece of plastic wrap against the surface of the cream to create an airtight seal and refrigerate the pastry cream until cold, or, if you want to cool it quickly – as I always do- put the bowl into a larger bowl filled with ice cubes and cold water, and stir the pastry cream occasionally until it is thoroughly chilled, about 20 minutes.

Sweet Tart Dough
Makes 1 9″ Crust

Storing: Well wrapped, the dough can be kept in the refrigerator for up to 5 days or frozen for up to 2 months. While the fully baked crust can be packed airtight and frozen for up to 2 months, I prefer to freeze the unbaked crust in the pan and bake it directly from the freezer – it has a fresher flavor. Just add about 5 minutes to the baking time.

1 1/2 cups all purpose flour
1/2 cup confectioners sugar
1/4 tsp salt
1 stick plus 1 TBSP (9 TBSP) very cold (or frozen) unsalted butter, cut into small pieces
1 large egg yolk

Put the flour, confectioners sugar, and salt in a food processor and pulse a couple of times to combine. Scatter the pieces of butter over the dry ingredients and pulse until the butter is coarsely cut in – you should have some pieces the size of oatmeal flakes and some the size of peas. Stir the yolk, just to break it up, and add it a little at a time, pulsing after each addition. When the egg is in, process in long pulses – about 10 seconds each- until the dough, which will look granular soon after the egg is added, forms clumps and curds. Just before you reach this stage, the sound of the machine working the dough will change- heads up. Turn the dough out onto a work surface and, very lightly and sparingly, knead the dough just to incorporate any dry ingredients that might have escaped mixing.

Butter a 9″ fluted tart pan with a removeable bottom. Press the dough evenly over the bottom and up the sides of the pan, using all but one little piece of dough, which you should save in the refrigerator to patch any cracks after the crust is baked. Don’t be too heavy-handed – press the crust in so that the edges of the pieces cling to one another, but not so hard that the crust loses its crumbly texture. Freeze the crust for at least 30 minutes, preferably longer, before baking.

Preheat the oven to 375. Butter the shiny side of a piece of aluminum foil and fit the foil, buttered side down, tightly against the crust. (Since you froze the crust, you can bake it without weights.) Put the tart pan on a baking sheet and bake the crust for 25 minutes. Carefully remove the foil. If the crust has puffed, press it down gently with the back of a spoon.

Bake for another 8 minutes or so, or until it is firm and golden brown. (I dislike lightly baked crusts, so I often keep the crust in the oven just a little longer. If you do that, just make sure to keep a close eye on the crust’s progress- it can go from golden to way too dark in a flash.) Transfer the tart pan to a rack and cool the crust to room temperature before filling.

Chocolate Crunched Caramel Tart

This recipe comes from Dorie Greenspan’s book packed full of wonderful dessert recipes.  This is not a dessert I would typically make because it is a bit labor intensive and time consuming. There are three components to the recipe, the tart shell, caramel layer and the chocolate ganache. Each component comes together fairly quickly and if you have experience making caramel this recipe will be a breeze for you.

This dessert is great for those who love a good Snickers bar, basically this is a Snickers in a tart form (minus the nougat). The tart dough was so good and is reason enough to make this recipe! Slightly sweet, great texture, just wonderful!

If, however, you are like me and would rather have a root canal than use a candy thermometer, this recipe can be a bit intimidating and nerve wracking. All in all in turned out well. I did have trouble with the caramel layer even though Dorie gives very clear directions. It was definitely not the recipe’s fault but baker-error that caused the issues.  My caramel layer turned out a bit thicker than I would have liked because I let it cook too long for fear of  it being too runny (this has happened to me in the past when I have tried making caramels).

Because my caramel layer was a bit thick, once I added the nuts to it it kind of clumped up into clusters making it VERY hard to spread evenly over the tart shell.
Next time I will A) not cook as long, B) may double the caramel layer and C) spread the caramel over the tart shell and then sprinkle the nuts on top since I think it would be hard to spread even if it was thinner just because the nuts liked to cling to the back of my spatula and dug into the shell. You can tell in the pictures the caramel layer is quite thin.

Despite the error, this turned out very well. I was fearful we would break a tooth (and thus requiring a root canal, the irony in that would not be lost on me) after it set up and chilled. We were surprised when we took our first bite and while the caramel was firm (ok, it was hard) it was not tooth-breaking hard. Yeah! Minor success!

This tasted great and we really enjoyed it. It is not something I will be whipping up again soon, but will be using the tart shell for some Berry Tarts this spring!

I rate this recipe an 8

Chocolate-Crunched Caramel Tart
by Dorie Greenspan

For the tart shell:
1 egg yolk
2 tbsp. very cold water
1 tsp. vanilla extract
1 1/4 cups all-purpose flour
1/3 cup sugar
1/4 tsp. salt
8 tbsp. cold unsalted butter, cut into 1/4-inch cubes
For the caramel layer:
Scant 1/2 cup heavy cream
1/2 cup sugar, sifted
1 tbsp. light corn syrup
2 tbsp. salted butter, cut into 4 pieces, at room temperature
Pinch of salt (if using unsalted butter)
3/4 cup honey-roasted peanuts, coarsely chopped
For the ganache:
8 oz. bittersweet chocolate, finely chopped (I used 4 oz bittersweet and 4oz semi sweet chocolate)
1 cup plus 2 tbsp. heavy cream
4 tbsp. unsalted butter, cut into 4 pieces, at room temperature
Directions:

To make the tart shell, in a small bowl stir together the egg yolk, water and vanilla; set aside.  Combine the flour, sugar and salt in the bowl of a stand mixer fitted with the paddle attachment.  Add the butter and beat on medium-low speed until the mixture resembles coarse cornmeal, with butter pieces no larger than small peas.  Add the egg mixture and beat on low speed just until the dough comes together.  Wrap in plastic wrap and refrigerate until well chilled, about 30 minutes.

Preheat the oven to 425 degrees F.  When you are ready to roll out the dough, unwrap it and place it on a lightly floured work surface.
Roll out with a floured rolling pin, lifting and turning the dough occasionally to prevent it from sticking to the work surface.
Roll it out evenly until it is large enough to line a 9-inch tart pan and is about 1/8-inch thick.
Carefully transfer the dough to the tart pan, pressing it into the sides, and trim to remove the excess.  Cover the dough with foil or parchment paper and fill with baking beads.  Bake for 5 minutes.

Reduce the oven temperature to 350 degrees F.
Remove the foil and baking beads and using a fork, gently poke holes in the bottom and sides of the crust.  Bake until the crust is golden, 15-20 minutes more.  Transfer to a wire rack and let cool completely.Before making the caramel, make sure that you have all the ingredients measured out and ready to go because you have to work quickly once the sugar caramelizes.  Also have a medium heatproof bowl at hand to hold the hot caramel.

To make the caramel, bring the heavy cream to a simmer in a small saucepan.  Meanwhile, heat a medium skillet, preferably nonstick, to medium heat and sprinkle in about 3 tablespoons of the sugar.
When it melts, stir it with a wooden spatula or a fork and sprinkle over another 3 tablespoons.  When that sugar is melted, add the remaining 2 tablespoons of sugar.
The sugar in the pan may already have started to color and that is fine.  Stir in the corn syrup and boil the syrup until it reaches a deep caramel color – it will probably begin to smoke, and that is normal.

Bring the simmering cream to a full boil.  Stand back from the skillet and stir in the butter and salt, if you’re using it.  The caramel will bubble furiously and may spatter, so be careful.  When the butter is in, add the warm cream – the caramel will bubble furiously again.
Lower the temperature just a tad and let the caramel boil for just 2 minutes.  (If you check the temperature with a thermometer, the caramel should be at 226 degrees F.)  Pour the seething caramel into the heatproof bowl and set it aside while you make the ganache.

To make the ganache, put the chopped chocolate in a heatproof bowl and have a whisk or rubber spatula at hand.  Bring the cream to a boil, then pour half of it over the chocolate and let it sit for 30 seconds.
Working with the whisk or spatula, very gently stir the chocolate and cream together in small circles, starting at center of the bowl and working your way out in increasingly larger concentric circles.  Pour in the remainder of the cream and blend it into the chocolate, using the same circular motion.
When the ganache is smooth and shiny, stir in the butter piece by piece. Don’t stir the ganache any more than you must to blend the ingredients – the less you work it, the darker, smoother and shinier it will be.

Cover the ganache with a piece of plastic wrap, pressing the plastic against the surface of the chocolate to create an airtight seal.  Set aside at room temperature for the moment.  To assemble the tart, stir the peanuts into the caramel using a rubber spatula.  If the caramel is too thick to stir or spread easily, gently warm it in the microwave in 3-second spurts.  (You can also hold the heatproof bowl about 10 inches above the burner on your range.  Check the consistency after a couple of seconds and repeat if necessary.)  Spread the caramel over the bottom of the tart shell in a thin layer.  Refrigerate the tart for 15 minutes to set the caramel.

Check the ganache.  If it has thickened and is no longer pourable, warm it in the same way as instructed for the caramel above.  Pour the ganache over the caramel and jiggle the tart pan to even it.  Refrigerate the tart for 30 minutes but no longer, and then keep it at room temperature until serving time.