No Bake Peanut Butter and Oatmeal Bars

I love a good no-bake dessert, especially during the warm months. I have made a several no-bake desserts over the years and love trying out new recipes.

These bars are so super quick to make, take few ingredients and are perfect for a last minute dessert. These bars are a bit like my other bar recipes and no-bake cookies combined. The flavor of peanut butter shines and the oatmeal makes these bars chewy and soft. I love the combination of peanut butter and oatmeal and to top it all off a yummy chocolate ‘frosting’.

The trick to these is that the mixture needs to boil for about 1 1/2 to 2 minutes in order for the bars to set. If you don’t boil long enough they will still be good, but just really gooey and difficult to eat. You can remedy this by keeping them chilled but just be warned at room temperature they will be messy! I will be making these again when I need a quick dessert, I am rating these an 8.5 only because I do like the other bars a bit better.

I rate this recipe an 8.5

No Bake Peanut Butter and Oatmeal Bars

3 Cups Oats
2 Cups Sugar
1 Cup Peanut Butter
1/2 Cup Milk
1/4 Cup butter
1 tsp vanilla

1 cup chocolate chips
1/2 cup butterscotch chips
1/2 cup peanut butter

Lightly spray an 8×8 pan with Pam.

In a medium sauce pan, melt the butter, sugar, and milk. Over a medium high heat, bring to boil making sure to stir constantly. Continue to stir and boil for 1 1/2 to 2 minutes after it reaches a rolling boil.

Remove the pan from heat and stir in peanut butter and vanilla until peanut butter is melted. Stir in oats.

Pour mixture into prepared pan and press lightly and make sure to spread out mixture evenly.

In a medium sauce pan, heat chips and peanut butter over medium heat and stir until melted. Pour over bars and spread evenly.

Allow bars to set before serving.

Flourless Peanut Butter Oat Bars

I made up this recipe based on the Hand Mixed PB Cookie recipe I love. The great thing about both the cookies and the bars is that they are flourless. I have no dietary restrictions but I know several people who do and they struggle to find good cookie or dessert recipes that don’t call for strange ingredients in the place of flour.

These bars did not even require a mixer, I just stirred by hand. They were thrown together in less than 5 minutes and with 20 minute bake time were ready to enjoy in no time.

The bars came out chewy in the center and a little more crisp around the edges,  a little mix of texture to please everyone. I found these to not be too sweet and a small bar satisfied my craving. These would be good for a quick treat when you don’t want to dirty a bunch of bowls or use your mixer.

I rate these an 8 (if for no other reason than they are super simple)

Flourless Peanut Butter Oat Bars
adapted from here

1 cup creamy peanut butter
3/4 cup brown sugar
1/4 cup sugar
1 egg
1/2 teaspoon baking powder
pinch of salt
3/4 to 1 cup oatmeal  (add 1/4 cup at a time until desired consistency, oatmeal should blend in but dough should not be dry or too stiff)
chips (optional)

Spray an 8×8 pan with Pam.

Preheat oven to 350.

In a medium bowl stir together peanut butter and sugars. Add egg and baking powder. Stir to combine. Add salt and oatmeal. Stir until mixed. Gently fold in chips if using.

Press into prepared pan.

Bake for 15-22 minutes (do not overbake)

Butterfinger Bars

If you are looking for  a recipe that takes VERY few ingredients, can be made from start to finish in 30 minutes and is super delicious, look no further. I have had this recipe for years, it was in a homemade cookbook that I got from a school teacher with recipes compiled from her students. There is no name or citation to this recipe so I apologize if this is your recipe (just email and let me know and I will give credit).

The base of the bars is a sweet, buttery oatmeal crust topped with a chocolate and peanut butter mixture. The finished product is like a sinful granola bar. I don’t think they taste a lot like a Butterfinger (since they are named that) but I love them none the less.

These bars are not for the calorie conscious but we all need a treat now and again right? The only down side to these bars is they are very crumbly when warm and still slightly crumbly when cooled. I have made these millions of times and can not get them to be less fragile (email if you find the cure). I keep making these because they take care of my sweet tooth with a small bar, so I don’t feel guilty about eating one (or 10).

I have added toffee pieces to the top of the chocolate mixture (while warm) for a bit of a twist.

I rate these bars a 9 (if for no other reason than they are so simple and easy)

Butterfinger Bars
1 cup brown sugar
1 cup white sugar (I use 3/4 cup)
1 cup butter (I use 3/4 cup)
4 cups oatmeal (I use quick cooking)
1 cup Peanut butter (I use creamy)
1 cup chocolate chips (about 6oz or a bit more)

Preheat oven to 350.
Grease a baking sheet (for thinner bars) or a 9×13 pan
In a medium bowl mix together the first 4 ingredients until combined and press into the bottom of the pan.
Bake for 12-15 minutes until golden but not brown
Melt peanut butter and chocolate chips (I nuke in microwave stirring after every 20 seconds until smooth)
Poor melted mixture over slightly cooled bars.
Cool before cutting (I LOVE these warm and crumbly so I eat with a spoon in a bowl!)

*I have also halved this recipe and used an 8×8 pan and baked for about 15 minutes.


Rice Krispy Treats Sandwich Bars

I found this recipe in my google reader, I had added it months and months ago but never got around to making them. Having a few extra days off for Christmas and having not consumed enough sugar (yeah right), I decided now was a good time to try them out.

I am not sure if I did something wrong or what, but these really didn’t do it for me. I wanted to like these, I really really did! But, instead, I found these to be really dry and to have too much butterscotch flavor for my liking. I followed the recipe exactly so I am not sure if I was just unlucky in the kitchen that day or what. Looking at the comments it seems many others like these so it may just be my finicky tastes as well.

The end product kind of reminded me of what my family calls Special K Bars except not nearly as good and a bit more work to make. I am willing to give these another go and maybe add more peanut butter next time to balance out the butterscotch flavor but I think next time I am craving a cereal snack bar I will stick with ones I know will satisfy my cravings!

I rate these a 6 (but would be willing to try again) 

Rice Krispy Treats Sandwich Bars
found here
3 cups (1 ½ 11-12oz bags) butterscotch chips
1 1/2 cups (384gm) creamy peanut butter
12 cups (1 12oz box) crisp rice cereal
4 cups (2 11-12oz bags) semi-sweet chocolate chips
½ cup (1 stick / 4oz) butter, cubed
2 cups (240gm) confectioners’ sugar
4 tablespoons water

Line the bottom of a 9×13” pan with parchment paper and spray the sides of the pan with nonstick cooking spray (tip: use nonstick cooking spray to help the parchment paper stick to the pan – seems to go against the name of the product, but it works.)

In a large saucepan over medium-low heat, melt the butterscotch chips and peanut butter, stirring. When smooth, remove from heat and add the crisp rice cereal. Stir to coat. Place half of the cereal mixture into the pan and pat down evenly. Place in the refrigerator to let it firm up a bit while preparing the chocolate.

Place the chocolate chips and butter in a microwave safe bowl. Melt together in the microwave over medium-low heat, stirring every 60-90 seconds, until smooth. Mix in the powdered sugar and water.

Spread the chocolate evenly over the cereal layer in the pan, then gently pat the remaining cereal mixture evenly on top. Refrigerate for at least two hours, then cut into squares with a sharp knife.

Makes 42.

Haystacks

Here is a treat that I have been making since grade school. All you need is a microwave. large bowl and a cookie sheet to whip these up. This is a no-bake treat that you can prep in under 15 minutes making them a perfect snack to make while dinner is cooking!

These are not a gourmet dessert or one to impress your friends but I love them so much that I have made them for many family events. My Taste Tester really enjoys them as well and has been known to hide them in random places in the fridge so I don’t eat them all.

These little treats have only three ingredients, chocolate, peanut butter and chow mein noodles. You decide how big or little to make your haystacks so I am not sure how many you will get. I usually get between 12 and 18. They do get your fingers a bit chocolatey while eating them , but that is the best part.

There are several variations of this recipe I am sure. To be honest I don’t really use a recipe at all, I just go by sight as to how many chow mein noodles to add. Sometimes I like them more chocolatey so I add fewer, other times I just use the entire bag. It is really up to you. I have also added toffee pieces or chopped nuts but to be honest, I prefer just the basic three ingredient haystacks.

I rate this recipe a 9

Haystacks
*All amounts are estimates, add more peanut butter or chocolate chips and noodles to suit your preference in taste and texture.

1 bag chocolate chips (semi sweet)
1/2 to 3/4 cup peanut butter (to taste)
1 bag (or a bit less) of Chow Mein noodles

Line a baking sheet with wax paper.

In a medium microwave safe bowl heat the chocolate chips and peanut butter in the microwave. Stir after every 15-20 seconds until smooth. Don’t overcook.

Stir in chow mein noodles 1 cup at a time until desired consistency is reached. You want the noodles either completely coated or just about. (see photo above) Don’t break them too much.

Scoop them onto a wax paper lined baking sheet and place in fridge until firm. Keep stored in fridge so they don’t melt.

Enjoy

Peanut Butter Cookies

Today I share with you the very first recipe my Taste Tester ever made for me. We had only been dating about a month and he surprised me with these when I stopped by to visit one rainy afternoon. After the first bite of these warm and gooey cookies, I knew, he was a keeper.

I ate far too many of these that afternoon. This recipe produces big, soft chewy cookies with a nice peanut butter flavor. He found the recipe in some old church cookbook his mom (now my mother in-law) had purchased for him. Little did she know it would help him snag a wife 🙂

Whenever I have a bad day, or if he just wants to cheer me up, these are cookies he makes for me and they always bring a smile to my face. If you are looking for a great basic peanut butter cookie recipe, here is one to try!

I rate this recipe a 9

Peanut Butter Cookies
no author

1/2 cup brown sugar
1/2 cup white sugar
1 egg
1/2 cup butter flavor Crisco (or butter)
1 teaspoon vanilla
1/2 cup peanut butter (smooth)
1 1/2 cup flour
1 teaspoon baking soda
1/2 teaspoon salt
Reese’s Pieces (as many as you want)

Preheat oven to 350 degrees.
Lightly spray mini muffin pan with cookie spray

In a large bowl, mix together the brown sugar, sugar and butter until light and fluffy. Add in the egg and vanilla. Continue mixing until incorporated. Slowly add the flour, salt and baking soda. Mix until combined. Stir in Reese’s Pieces.

Using a cookie scoop, scoop out about 2 TBS of dough, shape into a ball. Slightly press down on baking sheet.

Bake for about 8-12 minutes or until golden. Do not overbake.

.Remove from oven to cool.

Peanut Butter Torte

Once again, I turned to Dorie’s book for a no-bake sweet to satisfy my summer dessert cravings. I just hate using the oven and heating up the house when it is over 90 degrees outside! After paging through, I knew I had found gold when I read the words “Peanut Butter’. Yes please!

If you love peanut butter and want a rich, creamy dessert but either don’t want to bake a cheesecake or are scared to try. You must make this recipe!

Don’t be scared by the (once again) LONG recipe. This dessert has a few steps but none are difficult at all! I will warn you though, the torte is best after chilling for a few hours so plan ahead.

I adapted the recipe slightly as typed below to suit our personal tastes. Instead of an Oreo crust I used Nutter Butters (as you know my Taste Tester does NOT like Oreos). I also omitted the peanuts in the filling as I don’t like chunks in what I feel should be smooth and creamy desserts. Since I am not a fan of cinnamon with peanut butter, I left that out as well. For the topping I tossed some peanuts in melted butter and then in brown sugar. I baked unitl they were golden and allowed them to cool before garnishing the top with the ganache and nuts.

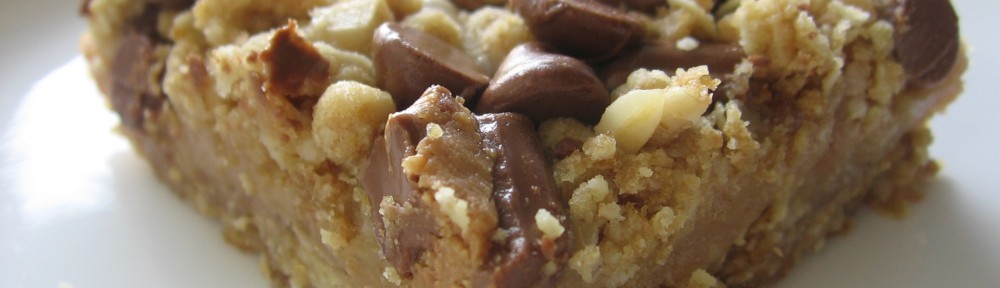
With my modifications I must say that this was a hit! It was perfectly smooth and creamy, much like a cheesecake but a bit lighter and not so dense. The crust paired perfectly with the filling and the candied nuts really rounded out this recipe.

I love taking a great recipe and with a few tweaks making it suit our preferences. Feel free to play around with the recipe and make it your own. I bet Reese’s Peanut Butter cups chopped up would be perfect on top of this great treat!

I rate this recipe a 9

Peanut Butter Torte
Adapted from Dorie Greenspan

1-1/4 c finely chopped salted peanuts (for the filling, crunch and topping)
2 tsp sugar
1/2 tsp instant espresso powder (or finely ground instant coffee)
1/4 tsp ground cinnamon (I DID NOT USE)
Pinch of freshly grated nutmeg (I DID NOT USE
1/2 cups mini chocolate chips (or finely chopped semisweet chocolate)
24 Oreo cookies, finely crumbed or ground in a food processor or blender (I USED NUTTER BUTTERS)
1/2 stick (4 tablespoons) unsalted butter, melted and cooled
Small pinch of salt
2-1/2 cups heavy cream
1-1/4 cups confectioners’ sugar, sifted
12 oz. cream cheese, at room temperature (I USED 1/3 LESS FAT)
1-1/2 cup salted peanut butter – crunchy or smooth (not natural)
2 tbsp whole milk
4 oz. bittersweet chocolate, finely chopped (I USED SEMI-SWEET)

Getting ready:
Center a rack in the oven and preheat the oven to 350°F. Butter a 9″ Springform pan and place it on a baking sheet lined with parchment or a silicone mat.

Toss 1/2 cup of the chopped peanuts, the sugar, espresso powder, cinnamon, nutmeg and chocolate chops together in a small bowl. Set aside. (I USED SOME CANDIED PEANUTS I MADE AS MENTIONED ABOVE)

Put the Oreo crumbs, melted butter and salt in another small bowl and stir with a fork just until crumbs are moistened. Press the crumbs evenly over the bottom and up the sides of the Springform pan (they should go up about 2″ on the sides). Freeze the crust for 10 minutes.
Bake the crust for 10 minutes, then transfer it to a rack and let it cool completely before filling.

Working with a stand mixer (fitted with the whisk attachment) or with a hand mixer in a large bowl, whip 2 cups of the cream until it holds medium peaks. Beat in 1/4 cup of the confectioners’ sugar and whip until the cream holds medium-firm peaks. Scrape the cream into a bowl and refrigerate until needed.
Wipe out (do not wash) the bowl, fit the stand mixer with the paddle attachment (if you have one), or continue with the hand mixer, and beat the cream cheese with the remaining 1 cup confectioners’ sugar on medium speed until the cream cheese is satiny smooth. Beat in the peanut butter, 1/4 cup of the chopped peanuts and the milk.
Using a large rubber spatula, gently stir in about one quarter of the whipped cream, just to lighten the mousse. Still working with the spatula, stir in the crunchy peanut mixture, then gingerly fold in the remaining whipped cream.
Scrape the mousse into the crust, mounding and smoothing the top.

Refrigerate for at least 4 hours, or overnight; cover with plastic wrap as soon as the mousse firms

To Finish The Torte:
Put the chopped chocolate in a heatproof bowl and set the bowl over a saucepan of simmering water. Leave the bowl over the water just until the chocolate softens and starts to melt, about 3 minutes; remove the bowl from the saucepan (I heated my chocolate in the microwave in 30 sec. intervals).

Bring the remaining 1/2 cup of cream to a full boil. Pour the cream over the chocolate and, working with a a rubber spatula, very gently stir together until the ganache is completely blended and glossy.

Pour the ganache over the torte, smoothing it with a metal icing spatula. Scatter the remaining 1/2 cup of peanuts over the top and chill to set the topping, about 20 minutes.

When the ganache is firm, remove the sides of the Springform pan. It’s easiest to warm the pan with a hairdryer, and then remove the sides, but you can also wrap a kitchen towel dampened with hot water around the pan and leave it there for 10 seconds.

Refrigerate until ready to serve

Chewy Chocolate Cookies with White Chocolate, Toffee, Peanut Butter and Almonds

After polishing off an entire carton of Ben and Jerry’s “Everything but the Kitchen Sink” ice cream, I was craving more………….must be the weather.  Instead of buying and eating another entire carton of ice cream I decided to make a cookie that encompassed the same flavors as my Ben and Jerry’s because it is harder to eat an entire batch of cookies than it is to inhale that tub of ice cream (or maybe not, as I found out).

I started with this recipe that I have used a number of times when I craved chocolate but didn’t feel like a brownie but modified it a bit.

The recipe produces a soft, chewy cookie that lends itself to being the perfect backdrop for a number of add-in possibilities. Don’t get me wrong, the cookie itself still shines, it just does so in a ‘not-in-your-face’ sort of way. I have to say that this recipe more than hit the spot. I found myself grabbing one every time I entered the kitchen which I made sure was quite frequent. Like many chocolate cookies, I find the flavor only improves as they cool and seems to intensify a bit.  After cooling a bit the cookie remains soft and chewy with a bit of creaminess from the white chocolate, a bit of saltiness from the peanut butter cups and a bit of sweetness from the toffee and a bit of crunch from the nuts. All in all, these cookies have something for everyone.

These were so dangerous for me, I ended up taking them to a work event just to get them out of my house. Needless to say these were polished off in no time flat by the gentlemen and several commented “these are so much better than anything my mom every made”. The best compliment one can get in my book.

I have amounts for the ‘add-ins’ listed below but feel free to add more or less of an ingredient, I just eye-balled it and when by what I had on hand.

I rate this cookie a 9

Chewy Chocolate Cookies with White Chocolate, Toffee, Peanut Butter and Almonds
inspired by Ben and Jerry’s Everything But…. ice cream 

2 cups flour
½  cup cocoa powder
2 teaspoons baking powder
½  teaspoon salt
12 ounces semisweet chocolate, chopped
4 ounces bittersweet chocolate, chopped
4 large eggs
2 teaspoons vanilla extract
1 teaspoon instant espresso powder (optional)
10 tablespoons (1 1/4 sticks) unsalted butter, softened
1 1/2 cups packed (10 1/2 ounces) light brown sugar
1/2 cup (3 1/2 ounces) granulated sugar
4 oz. good quality white chocolate, coarsely chopped (I used Ghirardelli)
½ cup chopped chocolate covered Almonds (or regular almonds)
¾  cup toffee pieces
1  heaping and overflowing of cup chopped peanut butter cups (I used Reese’s)

*again, add more ‘add-ins’ if you want, i just didnt’ have any more on hand or i might have upped the amount of white chocolate and almonds for sure!

In a small bowl wisk the flour, cocoa powder, baking powder, and salt.

Melt the semi-sweet and bittersweet chopped chocolate in medium heatproof bowl. Be careful not to scorch or burn chocolate. Set aside to cool.
In a small bowl wisk the eggs, vanilla and Espresso powder until combined.

In a mixing bowl, beat the butter until smooth and creamy. Add sugar and beat another minute. Add the egg mixture until well mixed. Gently add the melted and cooled chocolate and beat until combined

Slowly add the flour mixture and beat until just combined. Do not overbeat. Gently fold in your ‘add-in’ options.
Cover with dough with lid or plastic wrap and let stand at room temperature until consistency is scoopable and fudge like, about 30 minutes.

Preheat oven to 350.
Line baking sheet with parchment paper. Scoop dough onto sheet and bake for 10-12 minutes or until edges are set but centers are soft.

Allow cookies to cool on sheets about 10 minutes before transferring to racks to cool completely.

Peanut Butter Cup Cookies

These cookies have been a favorite of mine since I was a little girl. Many of my Christmas’s were spent hanging out by the treat tray gobbling these up without being too obvious. I ate way more than my fair share and often had a stomach ache by dinner.

Were these worth it? Yep.There is something about the combination of peanut butter and chocolate that makes me go weak in the knees. While these have been a favorite of mine for years, this is actually the first time that I have made them! Usually I wait all year long for Christmas and gorge myself on the ones my relatives make.

However, an urge, a strong urge, called me to make these now and not wait. Maybe it is the changing weather, maybe it was the stressful week at work, whatever reason I gave in to my craving and just like Christmas, enjoyed too many to count. I am sure many of you are familiar with the recipe or at least the concept of the cookie.

Basically it is a peanut butter cookie baked in a mini muffin pan and then a miniature Reese’s peanut butter cup is smooched into it before they cool. What you end up with is a sweet and slightly salty peanut butter and chocolate treat. The size makes them perfect for enjoying more than 1 or 2 or 5 in one setting.These are a breeze to whip up but without a couple of tips can be frustrating to make.

First whip up the dough. I rolled them into balls, lightly rolled in sugar and then placed them into the lightly greased muffin tin. I used the back of my ½ Tablespoon to make an indentation into the balls so placing the peanut butter cup would be easier and less messy. (I have found if you press the dough using your fingers up the side of the cups that the edges do not turn out smooth and even but rather look jagged and less ‘cute’). Second, make sure your peanut butter cups are cool (I chill mine while the cookies bake). This makes them easier to push into the hot cookies. Last, I pop them back in the oven for about 2-3 minutes after I push down the peanut butter cup, this makes them melty and more cohesive.

Since I lightly grease the pan before baking these are usually a breeze to come out after cooling down. Overall, these have a special place in my heart not only for their taste but for the memories they bring back to me everytime I bite into one.

Go ahead, make some memories for yourself and bake some up today! Maybe these can be your Spring-is-coming cookie!

I rate this recipe a 9

Peanut Butter Cup Cookies

Adapted from allrecipes.com
1 3/4 cups all-purpose flour
1/2 teaspoon salt
1 teaspoon baking soda
1/2 cup butter, softened
1/4 cup white sugar
3/4 cup peanut butter
3/4 cup packed brown sugar
1 egg
1 teaspoon vanilla extract
2 tablespoons milk
30-40 miniature chocolate covered peanut butter cups, unwrapped (depending how many cookies you make), chilled
Sugar for rolling dough balls (optional)

Preheat oven to 350 degrees.
Lightly spray mini muffin pan with cookie spray

In a large bowl, mix together the butter, sugar, peanut butter and brown sugar until light and fluffy. Add in the egg, vanilla and milk. Continue mixing until incorporated. Slowly add the flour, salt and baking soda. Mix until combined.

Using a cookie scoop, scoop out about 1 TBS of dough, shape into a ball.
Lightly roll in sugar. Place into mini muffin pan.

Bake for about 8 minutes.Remove from oven and immediately press a mini peanut butter cup into each ball. Cool and carefully remove from pan.

Peanut Butter Snack Cookies

I made this recipe up based on some snacks I had left over from a party and wanted to use up. This was quite a yummy experiment and I may make these again whenever I am craving something a little different than my typical stand-by Peanut Butter cookie recipe.

These cookies have a delicate peanut butter flavor, not overpowering at all. This subtle flavor is a nice backdrop for addition of the variety of snacks I used. In this case I had some pretzel sticks, M&M’s, peanut butter M&Ms and threw in some peanut butter and milk chocolate chips for good measure. I also added a few quick cooking oats which enhanced the chewiness of the cookie without being too detectable (for the oatmeal haters out there, gasp)

I chilled my dough for about 5 hours since I had a house to clean. Even if you don’t have chores to do, I would recommend letting the dough chill for at least an hour or two to allow the flavors to blend and the chilled dough will help the cookies keep their shape while baking.

Make sure not to over bake these, if you do they will be pretty firm out of the oven, I made this mistake with one pan. If you watch them and take them out when they just turn golden you will be very happy!

The end result of this little experiment is a chewy cookie packed with sweet and slightly salty flavors. The outside of these cookies baked up slightly crisp while the interior remained soft and chewy. Fresh out of the oven these were very hard to refuse! After a day or so these did harden up a bit more than I would have liked but I threw a slice of bread in the sealed container with them and they softened right back up. A 10 second jolt in the microwave before eating will produce the same results but also provide you with a warm and gooey treat as well!

I rate this recipe an 8

Peanut Butter Snack Cookies
1 stick (8 TBS butter) softened
½ cup peanut butter
1 cup brown sugar
½ cup sugar
1 egg
1 egg yolk
1 tsp vanilla
½ TBS milk
2 cups flour
½ cup quick-oats
1 tsp baking soda
½ tsp salt
¼ cup peanut butter chips
¼ cup chocolate chips
½ cup broken pretzel sticks
½ cup M&Ms
½ cup peanut butter M&Ms

Preheat oven to 350.

Line baking sheets with parchement paper.

In a large mixing bowl, cream together the butter and peanut butter. Once combined beat in the white sugar, and brown sugar until well blended. Beat in the egg, milk, and vanilla.

In a large bowl wisk together the flour, baking powder, and salt. Gently add to creamed mixture and mix until almost combined.

Fold in the oatmeal and snack additions just until combined.

Chill dough at least 60 minutes.

With a tablespoon, place balls of dough on prepared baking sheet.

Bake for 8 to 10 minutes in the preheated oven, or until edges are lightly browned.

Remove from oven and cool on baking sheets for 5-10 minutes until sturdy enough to be transfered to a wire rack to cool completely.